I had a question from one of my readers recently:
How do I go about adding (c) copyright type watermark to multiple images in Photoshop Elements?
You may want to do this if you are uploading your photos on the web, so I thought I’d share this with you too!
Using the Process Multiple Images feature in Photoshop Elements you can batch process your images and resize, add a water mark and more.
Creating a watermark
Watch the video or read on below for step by step instructions.
A quick answer for you!
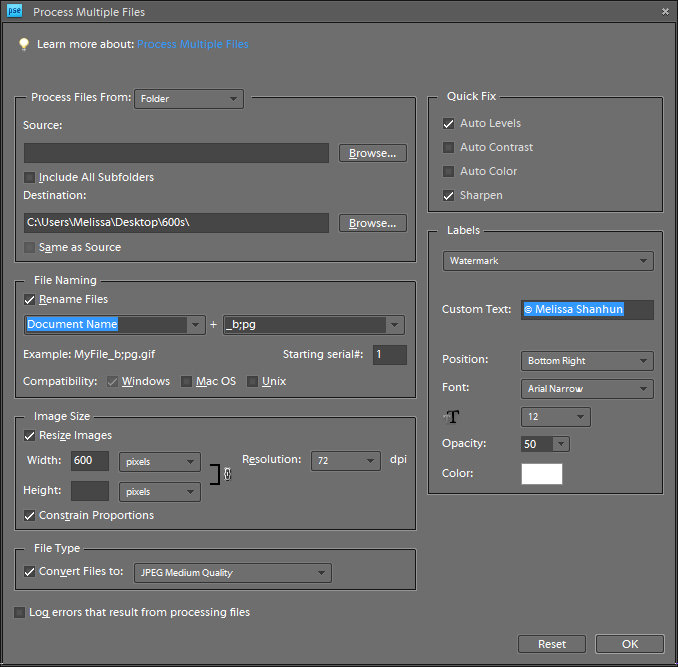
- Go to the file menu – then click Process Multiple files.
- Navigate to the folder of images you want to process. (or open them first and work with the opened files)
- Put in the details of how you want to alter the images (resizing etc)
- Leave anything you want to keep the same blank
- Add your copyright message into the custom text box on the right hand side – see screen shot below (You can insert a copyright logo by typing Alt+0169 on the numeric keypad, or just copy and paste this one into the text field ©)

- Click OK
- Wait for Photoshop to process each of the files
- The resulting image looks like this:

You can learn more about Photoshop Elements here
